Wednesday, February 19, 2014

Just say "NO" to fake lawns

Yesterday, our neighbor came by.  He is a really nice guy, smart and generally an intellectual and interesting person.  He mentioned that he had been talking with his wife about converting his lawn to a native garden, like what we are doing, and she didn't want to.  She didn't want to have it go brown in the summer and so they were just going to put in a fake lawn.  GASP!  EGADS, NO!!!  Don't do it!  I was shocked... especially since he seemed like such a smart guy.
Fake Lawn- I picked this because it is a great image in that it looks really
really good.  It looks real.  I can understand how people can get seduced
into thinking this is a good idea.  But think first... PLEASE!  Don't do it.
I hope that for anyone reading this, you can pass along some information- first... there are a lot of things you can do to leave a "lawn" type look without replacing with "synthetic turf".  There are plenty of alternatives that will not go brown in the summer, including Red Fescue- as it is not an obligate summer dormant species.  With water, it will stay green and it will take a lot less water than a typical lawn.  Check out this link for some other water saving ideas on lawn replacement- what we are doing is not for everyone.  I don't expect that everyone will want to do the type of extreme sport version of native gardening that we are doing- but replacing your lawn does not have to be painful or extreme.

Wabi-sabi is a Japanese term for the beauty in the imperfect.  Master potters and other artists make their art to have intentional flaws so that they are never truly perfect.  "Perfect" is boring.  Instead, they are unique through their flaws and beautiful because of their unique imperfections.  I am very sensitive to wabi-sabi: I like the white picket fence much more as age sags the posts, lichens cling to the paint and plants start to wend their way between the boards.  (I also like to think of myself as having a wabi-sabi personality... eh, not quite "perfect".)

It use to be that I thought of fake lawn as just horrible looking, as it has no wabi-sabi.  A natural lawn, even a perfect one, still retains wabi-sabi in that it is transient in its perfection.  It grows and needs to be trimmed.  It has some deeper and more lush color in some places than others.  Even the most chemically treated and manicured lawn is still alive and still ever changing and dynamic.  I use to just see fake lawns as a ghastly abomination of bad taste- something pretending to be something that it is not.  An imposter who robs the world of wabi-sabi and dynamic beauty.

Now, however, I know that fake lawns are much, much worse than just what they look like (for those of us who don't like fake things)- they are habitat deserts.  Barren ecology.  Strip mining for the urban landscape.  I talk about imagining what your neighborhood would look like if people thought of their yards as habitat- more birds, more butterflies, more life.  What happens when they all put in fake lawns?  From an animal perspective, it is worse than just empty of food- it is devoid of life.  Habitat Desert.

As much as chemically treated, over watered manicured lawns are not my goal... even these do provide some ecology.  They are still living and still harbor insects, bacteria and fungi that help to support the animal community.  A fake lawn has no ecology whatsoever at all.  Yes- it might look very real.  I can understand why people might be drawn to them.  They look really pretty realistic.  But no matter how much they look like a lawn, they never will be.  They do not have soil under them- they have rubber.  They do not have the microbe community living within them and they give nothing back.  They take and do not give.
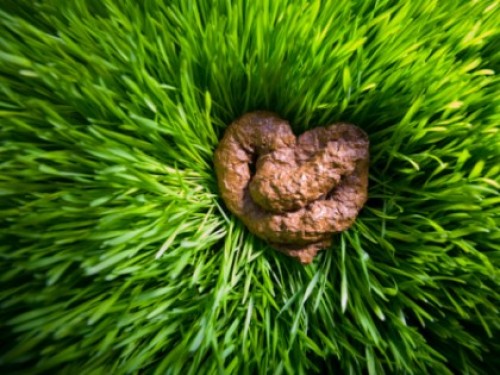
Missing those microbes now, eh?
Try this thought experiment: Think about dog poop... when a dog poops on a lawn, you pick up most of it and don't worry about the little bits of poop particles that are left over because it will compost into the soil and become inert, safe and actually provide a bit of nitrogen to your soil.  Even Fido's excrement gives back.  When a dog poops in the house, it is a disgusting affair because you can't just pick up the majority and call it good enough.  Those poop particles will not compost on your carpet.  It is unhealthy, smelly and vile because you do not have the microbe community to break down the poo into inert elements.  Same goes with your fake lawn.  That dog poop that is left over from where you pooper-scooped?  Better get out the bleach bottle because that stuff ain't going away.

And for the pee?  It cannot absorb or break down pet urine since there is no microbial community.  Unless you like the smell of pee, better make sure your dog and the neighbor's dog find other places to lift a leg.

If that is not enough to convince you...

People often are drawn to the fake lawns because they want to save water.  They have the vision of frolicking on their lush green lawn and having the advantages we all love of a lawn- a nice hot summer day, cool grass underfoot.  But fake lawns are not living and transpiring like grass.  Instead, think of them as a blacktop parking lot baking under the hot summer sun- for they trap heat instead of provide cooling relief.  Putting your lawn chair out on one might not be the best place to sip your lemonade on a hot day.

I had no idea about how much heat these fake lawns can make until I met Caspar who was working in construction.  He had put in "synthetic turf" athletic fields for the Harker School (Cupertino, CA) in their LEED Platinum renovation.  I really like fake grass for athletic fields and thought that it was great.  It is a really good playing surface and amazing how much it really does look like grass.  I thought that it was a great idea as a way of saving water.  Turns out, however, that they have to irrigate those fake turfs because they get too hot to play on!  I had no idea!

It makes a lot of sense when you think about it- the reason lawns needs a lot of water is that they transpire- water evaporates out the blades and more water is sucked up from the roots.  Lawns feel cool because the soil is usually moist under them but also because they are releasing water as they suck up what is left below.  Landscaping affects the temperature in the air around it- think of how cool it is under Redwoods, even on a hot day.  Trees affect air temperature through more than just shade- a wisteria covered awning is cooler than just a canvas one.  So now picture how your house and yard will feel when you have taken away the soil, the grass and the water and replaced it with fake stuff that bakes in the sun?  Not the same vision of the booklet- you don't just get a perfect, maintenance free lawn year round.  You get the fake one that is not real.  It is only pretending.

And if you are still considering the fake lawn... (I thought I had you at "dog poop"...) please remember this.  They are not recyclable and will not biodegrade.  Back in the 70's, people put in astroturf and now we scoff at it.  But even astroturf was pretty easy to get rid of- plastic carpet to fill up the good ol' landfill.  The new synthetic lawns are really remarkable for what they are: and it is pretty brilliant how they make them.  They use rubber to help recreate the spongy feel of real soil.  But how do you get rid of it?  When some time has passed and your yard is now seen as we look back on the astroturf days- bad taste and ugly, what do you do?  The bulk of your lawn will spend the next millenium taking up residence in a landfill but that ground up rubber will live forever in the dirt behind because it will never degrade and there is no way to physically ever remove it.  They will always be there.  Is that really what you want?  For your yard to forever have ground up car tires in the dirt?  Forever?

I remember my mother complaining to me as a kid about how much she hates fake flowers.  I thought she hated them because they looked fake and tacky and found some that looked really real.  She hated them even more- because when she saw them, she gasped in beauty only to be so let down by the fact that they were not real.  Nature makes things far more amazing and beautiful than we can- and just like all other things that are fake... it isn't the real thing.

Please- there are other alternatives.  We don't have to resort to fake.  Be a real person and chose real- real anything is better than fake.

Tuesday, February 18, 2014

Boiling my Redbuds

Spectacular fall colors are not something you think of when you think of California Native Gardening.  I think that I am not alone in thinking that browns in the summer take over from the brilliant greens of the spring and then... well that things kind of rest for a while while waiting for the winter rains to start the growing cycle again.  That is, however, not always the case.

When Caspar and I have been working on our grand plan for our native garden experiment, one of the many criteria for plant combinations that we have thought about is fall color.  We are both suckers for the red, oranges and yellows of October and November and have been making sure that our plant pallet includes some that will put on a show late in the season.  One of our "must haves" for color is Western Redbud.

Pink/Purple Flowers, not red like the
name implies.
Western Redbud (Cercis occidentalis) is a drought tolerant small tree/large shrub that gives quite a show all year round.  It starts with pink/purple flowers that bud out when the branches are still naked to give a prolific display of spectacular bright color.  It doesn't stop there- as after the flower phase passes, it leafs out with lush green rounded heart shaped leaves that give way to red and yellow displays in the fall.  In fact, "This Old House" lists Redbud in the list of top 10 most spectacular trees for fall color... although they didn't specifically list C. occidentalis... but still.  In addition to the fall colors- the Redbuds produce distinctive seed pods that change from green, to deep purple and then to brown as the season progresses.  Such a showstopper must find a place in our yard!

I am not 100% sure yet how many Redbuds our grand plan will have, nor where they will be planted.  The Redbuds are tolerant of some partial shade but give the best shows when they have full sun.  I don't anticipate putting them in the front yard, as that is a garden of "oak woodland" and "meadow" and the Redbuds are found in dry canyons and slopes along the base of the Sierras- not our local oak woodland community.  More to the point, I am not sure we have a good place for one in the front yard.  I know that I want to try at least one on the back hillside where the colors can play off our Japanese Maple that is in a pot on our patio (our yard will never be 100% native as I still love my ornamentals and foodie plants).  I am not sure if the spot I hope will work will get enough sun for it to really thrive.  I hope so.  Even though I do not have plans for it in the front yard, with it being so spectacular, it might be hard to say no to it!
Western Redbud with spring flowers

I bought a packet of Redbud seeds from a supplier online.  Being on a tight budget for plants makes germinating things much more exciting since it can get spendy really quickly when you get as excited about plants as I do!  Thankfully- seeds are usually cheap.  In this case- I actually piggybacked it along with my order for Bush Lupine seeds since the nursery had a minimum order.  I only needed one packed of Lupine, so I bought the Redbud and some Nevin's Barberry (more on that later) to fill in the minimums.  I had read that I needed to boil the Lupine seeds before planting and did.  The Barberry's are in the fridge for the next couple months... but the Redbud I had just put in the egg cartons and watered.  I had not seen any special planting instructions for those and just went for it.

Seed pods changing color
It is really good to have friends who know what they are doing to help you out.  My best friend's father is a native plant expert and has been growing natives for decades.  He is a former scientist for the Park service (just retired!  Congratulations David!) and knows more about CA natural history than just about anyone I know.  Plants, animals, insects... he is the person you want to go out on a hike with.  He knows it all.  And, he really knows his natives.

Dr. David Graber is a good person to have in your email list when you are embarking on an adventure such as ours and I just got my first tidbit from him the other day- boil the Redbud seeds.

It sounds so odd- but boiling water can help seeds germinate.  Ever wonder why "one year seeding, 7 years weeding" applies?   The old wives tale about letting your weeds go to seed leaves you with years of seedlings and not just more work the next year.  Not all seeds germinate every year.  Seeds have evolved different mechanisms to protect themselves and stay dormant until growing conditions are right.  Some seeds need fire to germinate as they have a fire ecology strategy and others need to pass through the gut of a bird- fertilizer and distribution in one!  The seeds often have a hard protective covering that prevents germination unless it has been stimulated the right way.

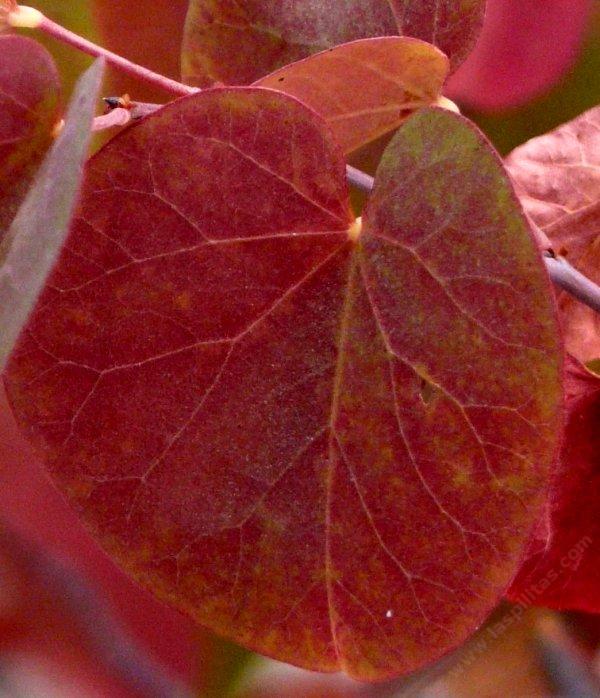
Fall color.
Scarification is the process of stimulating the seeds to germinate by attempting to break that protective coating.  There are different ways to do it, but one is by using boiling water to pour over the seeds and soak them.  Apparently Redbuds need some sort of scarification in order to germinate properly- so I dug up 18 of my seeds and poured boiling water over them and let them soak overnight.  I just replanted them today but am now second guessing myself- perhaps I should have redone the treatment?  Ideally- the seeds should swell up after treatment as the hard seed coat has been breached by the treatment and allows water to enter the seed and begin to soak into the tissues.  In my case, they didn't swell, so it might not work.

Another method of scarification is to physically scratch the seed coat and break the hard outside barrier- often with a nail file.  I have done this with some of my Redbud seeds but think that I will do more scratching and combine it with boiling for at least a couple.  Very scientific since I am just sort of hacking and trying to find out what will work.  Bottom line is that I have 24 cups with seeds and all I need is one... just the one for the hill and we will go from there.

So far, my Bush Lupines that were boiled and swelled up are germinating great.  I have actually had great germination success with my other plants too- so I will try a few more experiments on the Redbuds and see if I can get this spectacular tree to grow.

I feel like someone rubbing on a lamp hoping to get a genie. Rub Rub Rub!  If this works, I will have some extra Redbuds that I am sure I will be able to find homes for.  Thanks David!


Monday, February 17, 2014

Germination Notes: Purpleneedle Grass

Yesterday, when I was out on my hands and knees looking at my grass seedlings coming up through the soil- I noticed a couple that looked different.  Instead of the smooth wispy blades, these had slightly broader blades and have minute trichomes on them.  Not being a botanist- I will call them trichomes and guess that I am right.  Tiny hairs coming off the blades making them look a little fuzzy.  The Red Fescue is smooth.  Our sod has the trichomes as does Stebbins Grass (the weed I pulled from the Cactus garden as a pup doing an internship is the Strybing Arboretum waaaay long ago- I am still scared emotionally), but I am quite sure that this is neither.  This is still attached to seeds, so I will risk it and declare: "WE HAVE GERMINATION!  PURPLE NEEDLEGRASS IS HERE!  HORRAY!"
Purple Needlegrass
So far- it is only a few that I can find, but it really is like finding a needlegrass in a fescue stack.  Not easy.  Get it?  Get it?  Needlegrass in a Fescue stack?  Hahaha!  (I need to get out more- but I digress).

I am excited for the Needlegrass since I know absolutely nothing about grasses and it is a fun adventure to learn.  Before I embarked on this adventure, I had no idea that we had a state grass, nevertheless the name of the state grass.  Now I know that this particular grass has roots that can go up to 20' deep.  Wow.  I learned from Google, that it is the state grass because it is the most widespread (and use to be the most dominant grass species), it produces lots of seeds and many Native American tribes depended on it for food, it can stand up to the nasty invasives better than some species and with that massive root system, it can help stabilize hills and is more drought tolerant.  I learned from planting it why it is called "Needlgrass" as I stabbed myself with a couple seeds when sowing them.  One drew blood.  Well... kinda.  I mean it hurt and all.  It was sharp.  Beyond all that, however, it also should be pretty.  It is in our yard for the later.

I have mentioned this a few times, but we have laid out the meadow as a "canvas" with "painted swaths" on top.  The Needlegrass is part of the swaths.  The Red Fescue should be a low mounding grass that will give a good background but the Needlegrass should be more dramatic.  We have it just in specific places to form 2' tall bunches that form purple tinted flower stalks.  Sounds pretty to me, but just as I have said over and over, this is all just an experiment and I have no idea how it will turn out.

Another day- another germination.  Let the good times roll!


Saturday, February 15, 2014

Spotlight on: Shooting Stars

I will never forget seeing Shooting Stars for the first time- I was just out of my freshman year in college and I was backpacking in Oregon and walking across an alpine bog for the first time.  The feeling of the soft ground squishing beneath my feet and the earthy smells still linger fresh in my mind. I also remember the mosquitos.  It was beautiful.  More beautiful than I could imagine.  I was happier than I could ever imagine being. It was there that I found the shooting stars.

Beautiful purple flowers jutted up from the saturated ground and threw back their petals, thrusting their yellow and black faces forward.  I was enchanted.  I simply loved them.  They were simple.  They were elegant.  They were very appropriately named.

Shooting Stars that first captured my heart.
I came across this photo gallery when searching the web for native garden info and recommend it to anyone who wants to see native plant porn.  This is just breathtaking work- Saxton Holt's Gallery.  This shot of his of a Shooting Star helps you see what it is that I fell in love with all those years ago...

The ones that I loved grew in alpine bogs and other very wet places and were semi-aquatic Dodecatheon alpinum... imagine my surprise when I was hiking in Sonoma County and saw them in a dry meadow for the first time!  Although D. alpinum is a thirsty plant, we have a local species that actually needs really dry summer soils in order to establish- D. clevelandii.

I had been scouring native nursery online inventories trying to find a source for them to no avail when I found a seed supplier.  I was a bit startled to realize that they were coming all the way from the UK!  My love of them found me ordering five packets as soon as I could.  I always prefer to buy local to help preserve local genetic variation, but.... I couldn't help it.

I read on one native nursery blog that shooting stars might take up to three years before they flower- so hence the lack of abundance in the nurseries... so far, I have my fingers crossed that my little seeds will eventually yield the spectacular flowers I adore so much.

I mixed four of the packets into our "canvas" for the meadow, essentially sprinkling them throughout the front yard.  But since I love them so much- I saved one packet to plant in egg crates.  They make great seedling nurseries.  I am THRILLED to report that three of the seeds that I can see on the surface have miniscule white root just starting to poke through!  WE HAVE GERMINATION!  Mere mortals might not see it without a microscope... but a dedicated (and obsessed) nerd will find that tiny tell-tale sign of emergence.  So, even if our meadow plantings bust, I hope to have some grown separately that I can transplant as they get bigger.  Fingers crossed for one of my favorites!  (PS- I kind of say that about all wildflowers... but shooting stars really are my favorites.  Well... those and, and and.)

Friday, February 14, 2014

Germination Notes: Day 13

It has been almost two weeks since I planted (Feb 1st) and it is so much fun to see all the things starting to come up.  The Tidy Tips were first... followed by the CA Poppies, then the Red Fescue- and now we have some mystery germinators and the Five Spots just made a guest appearance.  I am pretty sure that we have some Mini Lupines coming up, but not positive.
Red Fescue and Five Spots
(I only know because that is where I planted them.)

Close up of our budding seedlings- the big green patches
are Tidy Tips and the silver green are Poppies.

Yes- I go out in my pajamas and sit on my hands and
knees to find my latest seedlings.  Nerd.
Meanwhile... I am already working on Phase II plantings.  The meadow that we have started from seed is just the base.  I do expect that it will take about 2-5 years for things to really start to establish and become mature and we will be adding some other plants that we are sprouting separately as focal points.  My most eagerly anticipated?  Silver Bush Lupine (Lupinus albifrons).

I am a sucker for Lupines in general- perhaps because they are one of the easiest plants to learn to identify and I am not (sadly) a botanist.  Lupines have "palmate" leaves- they have five leaves that come from a center step so that it looks like the palm of a hand.  It really is fun to go out and see a plant and have that surge of "HEY!  I know what that is!  It is a LUPINE" and your non-biologist friends will think you are some sort of a genius.  Humm... that might be why I like them.  I digress.

Lupines are gorgeous anyway- most are blue or purple but there are some spectacular yellow ones too.  The best part is they are really easy to grow from seed and the Bush Lupines are proving to be just as easy.  I found the seeds at Theodore Payne seed supplier and also picked up some Western Redbud seed and Nevin's Barberry (and endangered species because of habitat loss).  I did a scarification process on the Lupines by putting them in boiling water over night and they started germinating right away.

Once the meadow starts to really get going, we will add the Bush Lupine as well as CA Oatgrass and (possibly) CA Bottlebrush grass (both of which I am germinating in flats for the back hillside).
Egg cartons work great for sprouting. Lupine seed leaves poking up.
Not only beautiful, but great for ground birds like Towhee's to hide in.
It is toxic to livestock so we will have to put off getting a herd of cattle.
We picked the Bush Lupine because, once again, it is found locally at Edgewood.  It is a favorite for both of us and we will probably only plant two or three in the front yard.  They get big.  If anyone wants some extras- I will likely have at least two dozen come up and will only use about 5 at max.  Love to share, so let me know if you want to be on the hand-me-down plant list.  I am a zealot and like to spread the love :-)

Thursday, February 13, 2014

KILL YOUR LAWN! (Creating the Meadow: construction)

There are a number of ways to kill your lawn and plant a meadow- sadly... none are very easy.  The biggest challenge to planting native grasses and wildflowers from seed is weed control.  Weeds will out compete your natives and you will have a weed garden.  DOH!

On our back hillside, I tried probably the easiest method- solarization.  Putting black or clear (if in a hot enough area) plastic down to use the sun heat to cook the weeds and hopefully kill the seeds.  I watered to germinate the weeds after raking up the wood chips and then put down black plastic for a few months.  I had limited success.  The biggest problem that I have in the back are sourgrass weeds.  It is actually not a grass but a clover with a pretty yellow flower.  Problem is that it is a bulb and so solarizing doesn't work as the bulbs withstand any heat.  The hillside is also not in full sun so that it didn't ever really get hot enough either.  But it did seem to help, at least a little.

For our front lawn, however, I didn't want to put black plastic out for months on end and torture our neighbors so that left a couple other options.  One was to use Round-Up and kill the weeds.  I don't hate Round-Up.  As far as herbicides go- it is a miracle in that it really has phenomenally low toxicity and doesn't bioaccumulate or linger.  It is a whole other post on why Round-Up is bad... and why using it has problems... but let's leave it at regardless of what I think about the relatively amazing benign nature of such an effective herbicide... suffice it to say that I really didn't want to poison my lawn.

I chose to do a type of sheet composting method- this is really great and pretty creative, but by no means my idea.  Seedling roots are really really tough and good at going through things.  Hence rock being broken by roots (along with foundations).  But the seedling shoots are really pretty delicate and not evolved to be the tough tunnelers.  A simple way of converting lawn (and works for veggie gardens on lawns too) is simply to put down layers of newspaper and cover with clean dirt.  Plant directly on the dirt or compost and the roots go down through the newspaper as it degrades and the shoots of the weeds below can't come up.  The lawn smothers under the lack of sun and the plants on top thrive.  This is the method I chose.

I picked out the top soil from our local landscape supply and my only concern is that the soil is TOO nice.  Natives actually like crummy soil and don't need fertilizing and compost.  This nursery blend was so heavenly that I am a bit worried it is too rich for the natives.  Time will tell.  Anyway, since the lawn was about 1,000 ft2, I didn't want to have that many newspapers, so I bought paper mulch.  It is brown paper on a big roll and thicker than newsprint so you can use one sheet.  Since I didn't want the dirt mounded up along the sidewalk (and I was using 2-3" of dirt on top of the paper), I dug out the sod around the perimeter of the lawn and around all the landscape boulders.  ALSO- even though the lawn will not come up through the paper, it will come up around the paper.  Digging away the sod at the edges saves you weeding escapee lawn later.

I started by mowing several times to end up getting it as short as a putting green.  I then set to work on the edges with a spade shovel to cut the sod and a flat shovel to lift it out.  After digging up the edges (I used the leftover sod to fill part of a big planter box, placing the sod upside down and then later covering with leftover nursery blend), I then put down the paper and started shoveling.  I had ordered 11 cubic yards of soil and a ton of decomposed granite.  The granite was to be used for making a "hiking path" through the meadow.
Digging up sod is NOT easy- next time I might rent a sod cutter! 

I worked in sections, first laying down the paper and then shoveling dirt on top.  The hardest parts were around the rocks and in making the "hiking path".  To make the path, I put the DG (decomposed granite) onto the paper and used wood blocks to hold it in place as I filled in the dirt.  I didn't want a perfect and neat boarder or I would have used landscape bender board to delineate the walkway.  Instead, I wanted it to look more organic which was actually harder to make.
Adding paper and dirt over sod. Had been worried about
the dirt sliding down the paper on the slope, but it worked.

After I had a layer of paper and dirt down over the whole yard, I then carted more dirt to make it deeper and fill in the thin spaces until I had used up all the top soil (and my energy).

To seed the meadow, I started by making my "canvas" mix- putting 1/2# of Red Fescue into a bowl.  I really only needed about 8oz, but it was actually cheaper to by 1/2# because seed is a lot cheaper in bulk.  I then added the perennials that we wanted to be evenly distributed- a packet of White Yarrow, two of Purple Owl Clover (actually an annual), two of Buttercups and Blue-Eyed grass (not a grass), and then four packets of Padre's Shooting Star (my favorite and one that I think it going to be hard to grow- so I loaded up).  I was sparing on the yarrow because I know it grows well and I can add it later.  It can take over visually and so I wanted to be conservative.  The others should mix into the fescue and peak up without taking center stage.


Side Note: People spend a LOT of time and money trying to look like they do manual labor... looking lean, muscular and tanned.  I tell ya... forget that!  New workout trend should be manual labor.  11 cubic yards of dirt is ONE HELL OF A WORKOUT!  Grab a wheelbarrow and a shovel and get cracking! 

I don't know if this is necessary, but I mixed in some micorhizzae starter powder into the mix since it cannot hurt!  I am a big believer in probiotics for our family- so figured I should give the meadow the plant version.  It also helped make a medium that made it easier to spread the seeds.

My big pile of dirt- Want to know how hard it is to raise twin toddlers?
Grammy and Grampy watched the kids for a week while I dug and
shoveled. I was not all THAT much more tired than my typical week!
I broadcast the seeds by hand, just tossing them as evenly as I could.

The next step was the "swaths" of annuals and the taller grass- the Purple Needlegrass.  I took some flour to mark out where we wanted the swaths of each of the annuals and the Needlegrass and then I sprinkled seeds out.  For the swaths- we had Tidy tips, Miniature lupine, Poppies, and the Needlegrass.
Next- I walked over every square inch doing the chacha to pack down the soil a little and tap down the seeds.  I watered for no more than five minutes to give a quick little spritz and then lucked out with the first rains of the year coming RIGHT after I planted!
Now for the waiting game... waiting for germination.

Because I am a nerd and wanted our neighbors to know what we are doing- we put up a sign:  Cas printed it out and I laminated it for $3 at Kinkos.  We have had a LOT of people check it out and they are starting to ask questions.  Information Kiosk to come later... (I am actually not kidding.)

 
So far- it is about two weeks post seeding and we already have lots of germination.  Of the things that I can identify... we have Red Fescue, CA Poppies, Tidy Tips (the first to come up), Five Spots and a few that I can't ID yet.  I also planted some Shooting Stars in egg crates to transplant later and they have just begun to germinate- so hopefully they are germinating on the meadow too!  I get out on my hands and knees and look every day.


KILL YOUR LAWN! (Creating a Meadow: The plant list, the vision)

Death to the sod.  Down with the water hogging, habitat denuded, boring, high maintenance, manicured space filler... time for something meatier.  Building a California Native Meadow.

Blue-Eyed Grass: not a grass at all
but a member of the Iris family.
To start this project, we started with our vision and how we wanted to get there.  Instead of our neat and tidy (and thirsty) lawn, we wanted to create a wildflower and native grass meadow and eventually replace the perimeter shrubs and trees with natives.  Starting with the lawn we came up with the following:

We wanted the meadow to be primarily a single dominant grass species that needed little water, was clumping, spread by rhizomes, low mounding and a good base for mixing in perennial and annual wildflowers.  (PS- in case you are new to plants, perennial are plants that last from year to year and annuals die each year and are reborn from seed).  We wanted to use the dominant grass species mixed with a few perennial species as "the canvas" to then plant swaths of taller grasses and annual wildflowers.  Since we have children and love to have the neighborhood kids jump on our landscape boulders too- we wanted to make sure that it could withstand some traffic and not have to be babied.  After a lot of research, we decided on the following.

Red Fescue planted as a lumpy lawn.
Red Fescue (Festuca rubra) would be the dominant species.  Many different species could have worked here, but we chose the F. rubra because it has low mounds (3-12" high), spreads by rhizomes, can tolerate some shade, is noted as working well in meadow gardens, can be mowed and is also disease and pest free.  Sounds perfect, right?  Well... lets hope so!  It also happens to be really really beautiful.

We wanted to mix in some selected perennial wildflowers in low density to decorate the fescue- so we added White Yarrow (Achillea millefolium), Padre's Shooting Stars (Dodecatheon clevelandii), Western Blue-eyed grass (Sisyrinchium bellum), Buttercups (Ranuculus californicus) and Purple Owl Clover (Castilleja exserta).
Buttercup (top) & White Yarrow

We picked these because they are all found at Edgewood Preserve which is our local park that is famous for wildflowers.  All the species in the front meadow are not just native, but local so that people can expect that what we grow also grows in the local hills.  The Purple Owl Clover was specifically picked because it is a host plant for the endangered Bay Checkerspot butterfly.  I don't have a lot of delusion that we can get them into our yard, but if we can... I want them!  So we are planting the clover in hopes that we will get caterpillars and butterflies.
Purple Needlegrass

Shooting Star- may take up to
three years to bloom.
Purple Owl Clover
Shooting stars are one of my favorite wildflowers and are always so exciting to find- but they are hard to find in nurseries.  I think that I found out why when I read that one nursery had to wait three years for blooms!  My favorite seed supplier didn't have them, but I managed to find seed in the UK (!) and am thrilled to find out if they will grow.

Our "Canvas" would mostly be the fescue with the above species mixed in evenly by adding a few packets to the 1/2# of fescue seeds.

Ca. Poppies and Lupine
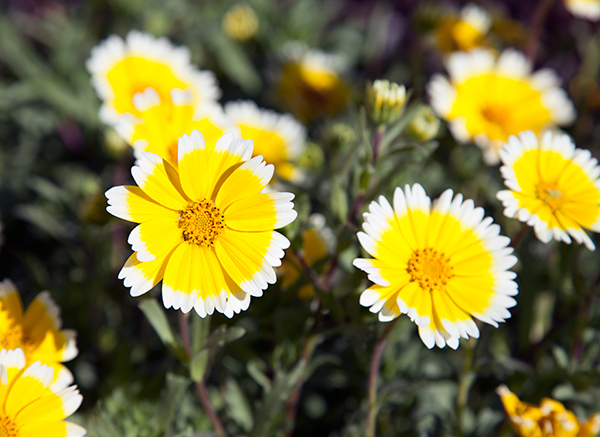
Tidy Tips
The next species that we planted were to be "painted" onto the "canvas" in broad swaths.  Purple Needlegrass (Nassella pulchra) is the state grass of California (who knew?) and is amazing in that its roots can grow up to 20' deep!  It is a taller grass that we wanted to have in big swaths to show off more dramatically against the lower mounding F. rubra.  Of course we HAD to have California Poppies (Eschscholzia californica) which are our state flower (and we knew that one, right?), as well as Tidy Tips (Layia platyglossa), Miniature Lupine (Lupinus bicolor), and Five Spots (Nemophila maculata).  Each of these annuals are most spectacular when massed, so we would spread the seeds in swaths to stand out against the fescue.

Five Spots
The idea of picking these species is that we wanted to bring some of what people would find at Edgewood into our own yard.  There are a number of species that I would love to add to our meadow, but we want to stay true to picking only those found regionally.  The next phase will involve planting live plants into specific places as the meadow starts to mature.  We expect that it will take about 5 years of growth for it to really being to mature and in that time, we will begin to add the other trees and shrubs around the perimeter that will help finish the yard.

This meadow will be dynamic throughout the year with spring being spectacular and summer being, uh... well... uh... less spectacular.  These species are adapted to wet winters and dry summers and will go dormant in the summer.  We will add some supplemental water this year and as needed to get the plants established and then hopefully- we will not water at all, or very rarely.  I expect to water once a week at most this year (depending on rain) and hope to scale back to once a month as the plants take hold.
Would be really thrilled if we could get something looking like this!